 AbsentMotion
Photos, video and speed
Add photos and videos, change their speed with a ruler or a curve, reverse a clip, freeze a frame and keep big videos smooth.
On this page
Add photos and videos
Open the Media tab of the Add menu and tap a picture or video. It is added at the playhead and sized to fit the canvas, with the file's rotation respected. A video lasts as long as the file. You can also use Camera in the same tab to shoot something new.
Photos and videos are rectangles with a picture fill, so all shape tools work on them: Transform, Frame & Shadow, Opacity, effects and so on.
By default the app keeps a copy of added media inside the project (the setting Keep a copy of imported media in the project). Files over 32 MB show "Copying ... into the project..." while the copy is made. If there is not enough free space the project keeps using the original file instead.
To fit a picture to the canvas, use the layer menu: Fit to Canvas shows the whole picture, Fill the Canvas covers the canvas and crops the edges, Stretch to Canvas distorts it to fit exactly. See Layer menus and multi-select.
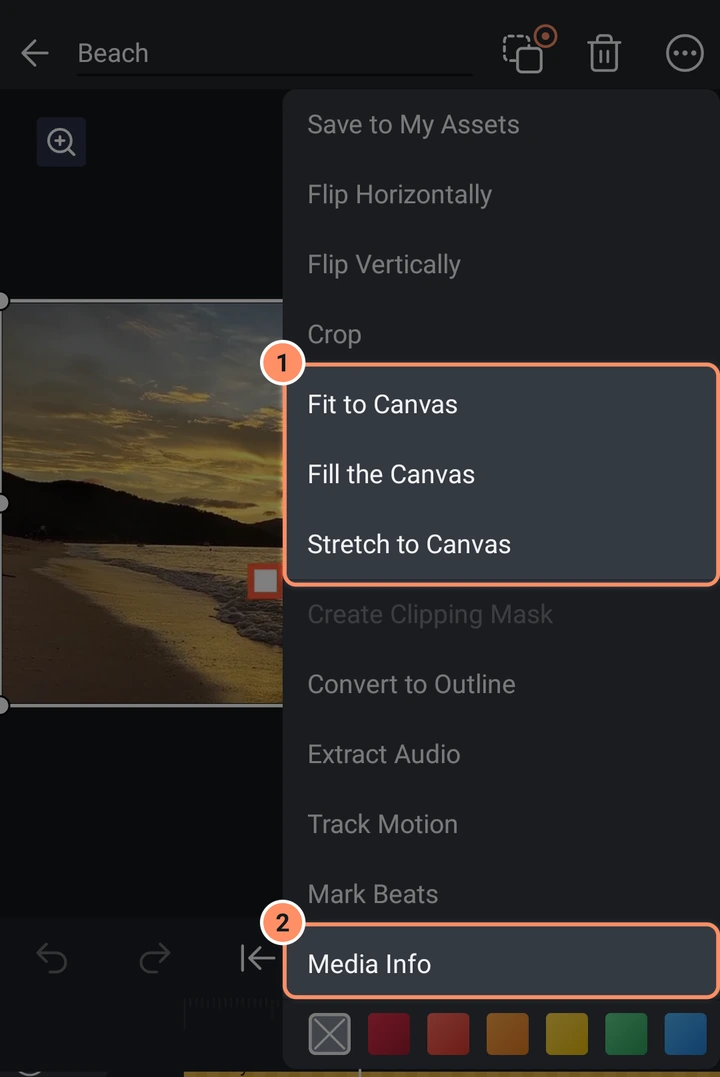
Media Info and swapping a file
Media Info in the layer menu shows the file's name, dimensions, frame rate, duration, format and size. Swap media file opens the photo picker and replaces that file in every layer of the project that uses it. This is how to fix a layer whose file went missing.
Speed
Select a video or sound clip and tap Speed (the first small button of the tool grid). The Time Remapping panel opens. It has two tabs at the top, Normal and Curve. It opens on Curve when the clip already has a speed curve.
Normal
- The buttons at the top set the start or the end of the clip to the playhead without trimming the video: the speed changes so that the same part of the video fits the new length. Only the buttons that fit where the playhead is are shown: Extend the start to the playhead before the clip, Trim start and Trim end inside it, Extend the end to the playhead after it.
- The ruler sets one speed for the whole clip, from 0.05x to 100x. Drag it sideways; it clicks at 1x.
- The box next to the ruler shows the speed and a small picture that changes with it: a snail, a turtle, a walking person, a rabbit, a horse and, at the top, a cheetah. Tap the box to type an exact value.
- Under the ruler are the chips Smooth, Reverse and Freeze Frame. They are described below.
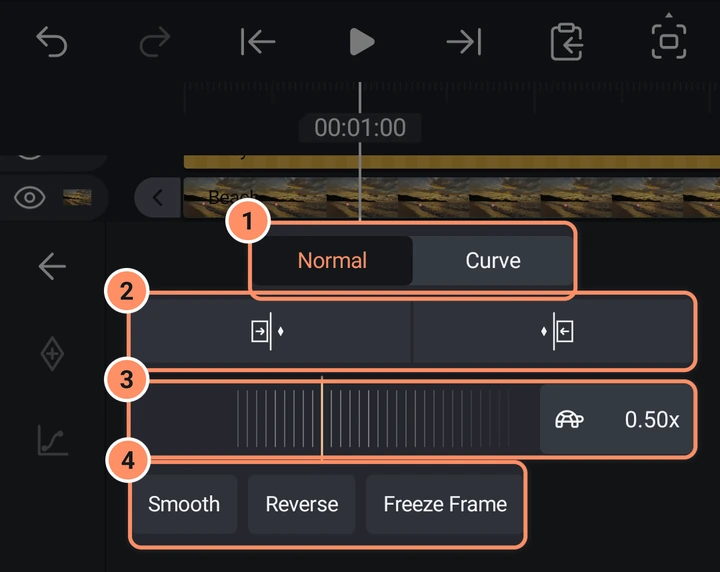
When the clip has a curve, the ruler shows its average speed. Changing it makes the whole curve faster or slower and keeps its shape.
The sound of a clip follows its speed, so its pitch changes with it.
Curve
The Curve tab changes the speed over time, for example to slow down only the best moment. A row of tiles scrolls sideways. Tap a tile to apply it to the whole clip.
| Tile | What it does |
|---|---|
| None | Removes the curve: the clip plays at a constant 1x again |
| Custom | A flat 1x curve for you to shape yourself; it opens the editor at once |
| Montage | 1x, 2.5x, 0.6x, 2.5x, 1x |
| Hero | Fast at both ends, slow (0.3x) in the middle |
| Bullet | Even faster at both ends (3x), very slow (0.2x) in the middle |
| Jump Cut | 1x, with a spike to 4x in the middle |
| Flash In | Starts at 4x and eases to 1x |
| Flash Out | Stays at 1x, then speeds up to 4x at the end |
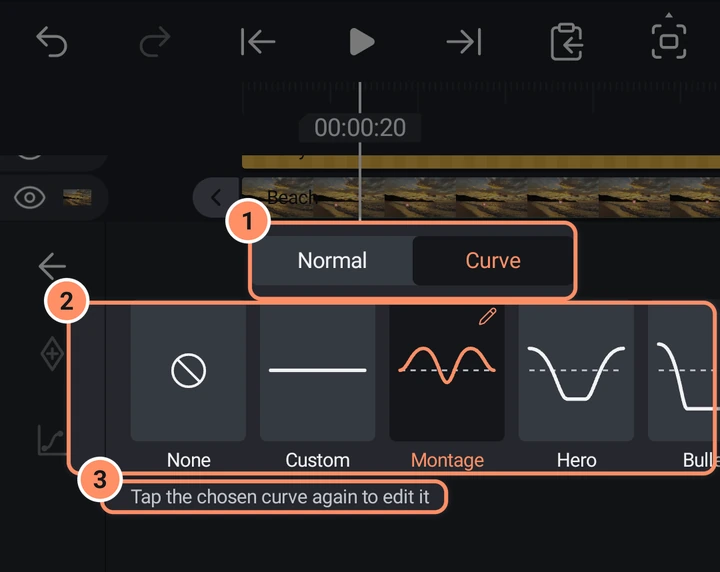
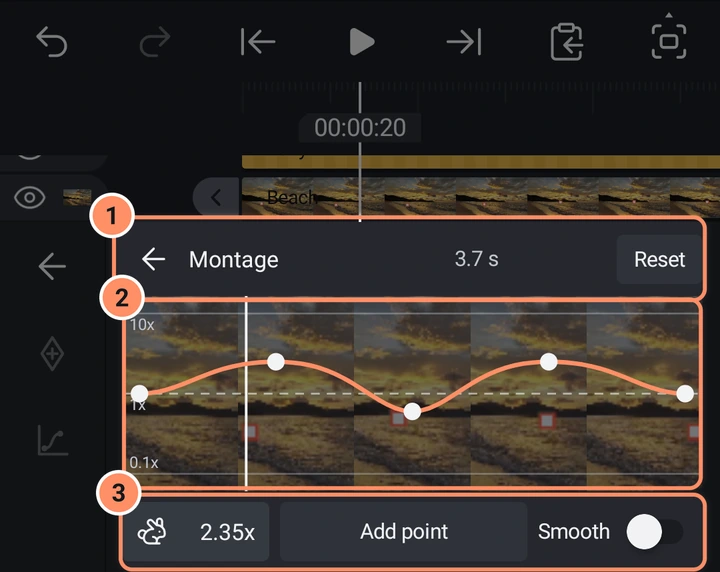
Tap the chosen tile again to edit its curve. The editor shows the clip's pictures with the curve over them, between 0.1x and 10x, with a dashed line at 1x.
- Move a point. Touch a point and drag it. Up and down change its speed, and the speed snaps to 1x and gives a small tick; sideways changes its place in the clip. A touch or a drag on the empty graph moves the playhead along the clip instead.
- Add point puts a new point at the playhead, up to ten in all. With a point selected, the button becomes Delete point; the first and the last point cannot be deleted.
- The box at the bottom left shows the speed of the selected point, or the speed at the playhead when none is selected. Tap it to type a value.
- The top bar shows the clip's length in the middle. While you drag it shows the old and the new length, for example "3.7 s → 4.2 s", and the change is applied when you let go.
- Reset puts back the curve you opened (a flat 1x for Custom). The arrow at the top left closes the editor.
- Smooth is a switch here: it is the same as the Smooth chip.
Reverse
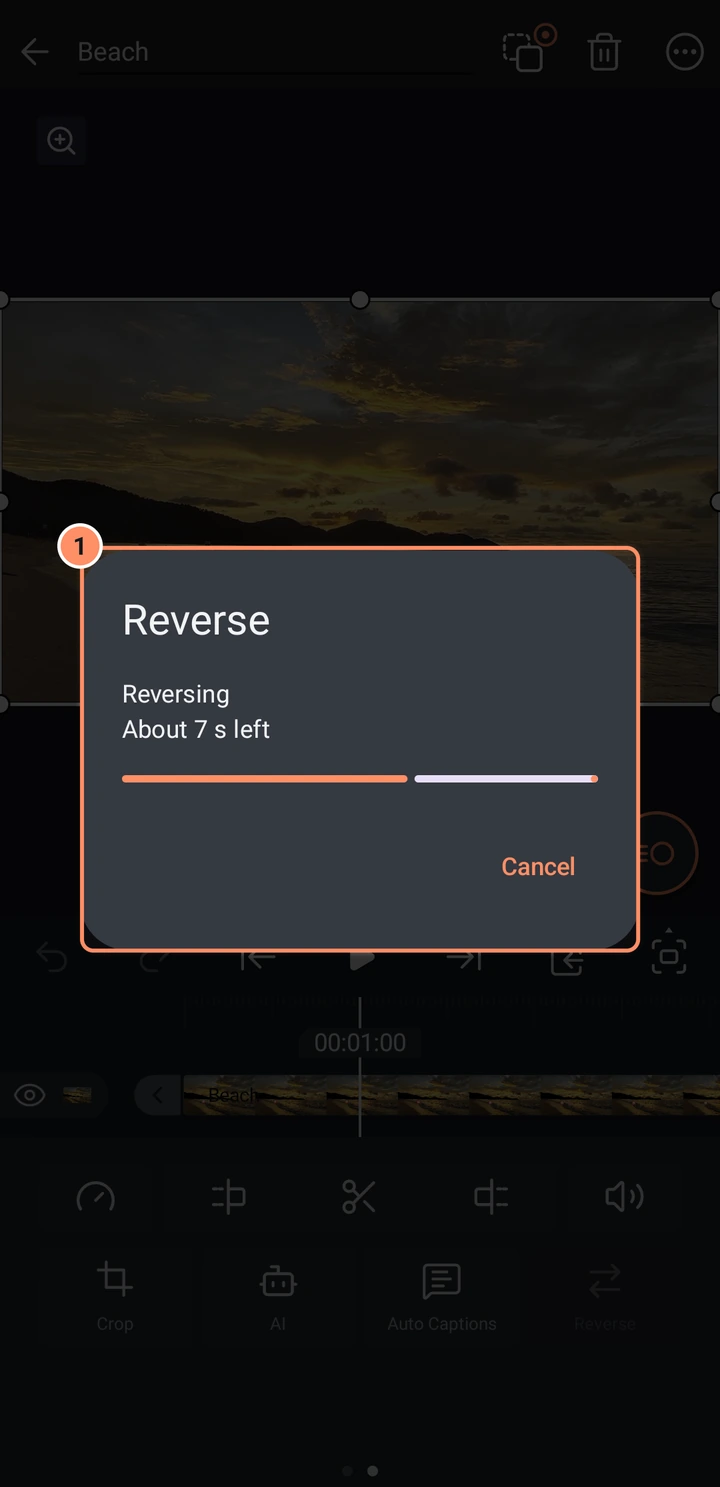
Reverse plays a video clip backwards, picture and sound. The app makes a reversed copy of the clip, so a long clip takes a while: a box shows Reversing and the time that is left, and Cancel stops it. A reversed clip has the chip lit in orange; tap Reverse again to go back to the original. The same button is on page 2 of the video's tool grid. A clip that has Smooth or Enhance must lose them first: the app says "Remove Smooth and Enhance from this clip before reversing it".
Freeze Frame
Freeze Frame (when the playhead is inside the clip) asks for the Seconds to hold (0.1 to 30) and holds the picture at the playhead.
Big videos and the preview
A video larger than 1920 x 1080, or one with more than two seconds between its internal key pictures, is slow to scrub. By default AbsentMotion makes a smaller copy in the background (a thin line along the bar shows the progress) and uses it for the preview and the thumbnails. Exports always read the original file. You can turn this off or clear the copies in Settings.
Take the sound out of a video
Extract Audio in the layer menu makes an audio layer from the video's sound and mutes the video. The new layer keeps the video's timing, speed, volume and audio effects. See Audio.
Remove the background
The AI tools can cut the background from a photo or a video and reduce noise in a recording. They run on your phone. See AI tools.
Smooth a clip
Smooth is the first chip under the ruler in a video clip's Speed panel (and a switch in the curve editor). It makes the in-between frames for that clip once and keeps them with the project, so the preview and every export show the smooth version. It is the best way to make slow motion look fluid: a 30 fps clip at half speed gets new frames between the real ones instead of showing each frame twice.
- Select the video clip and open Speed.
- Tap Smooth, then pick Frame blending, Optical flow or AI Smooth and a level (Low, Medium, High), and optionally Motion Blur. AI Smooth downloads its model once and shows how long it should take on this phone (see AI tools).
- Wait for it to finish. You can cancel at any time and nothing changes.
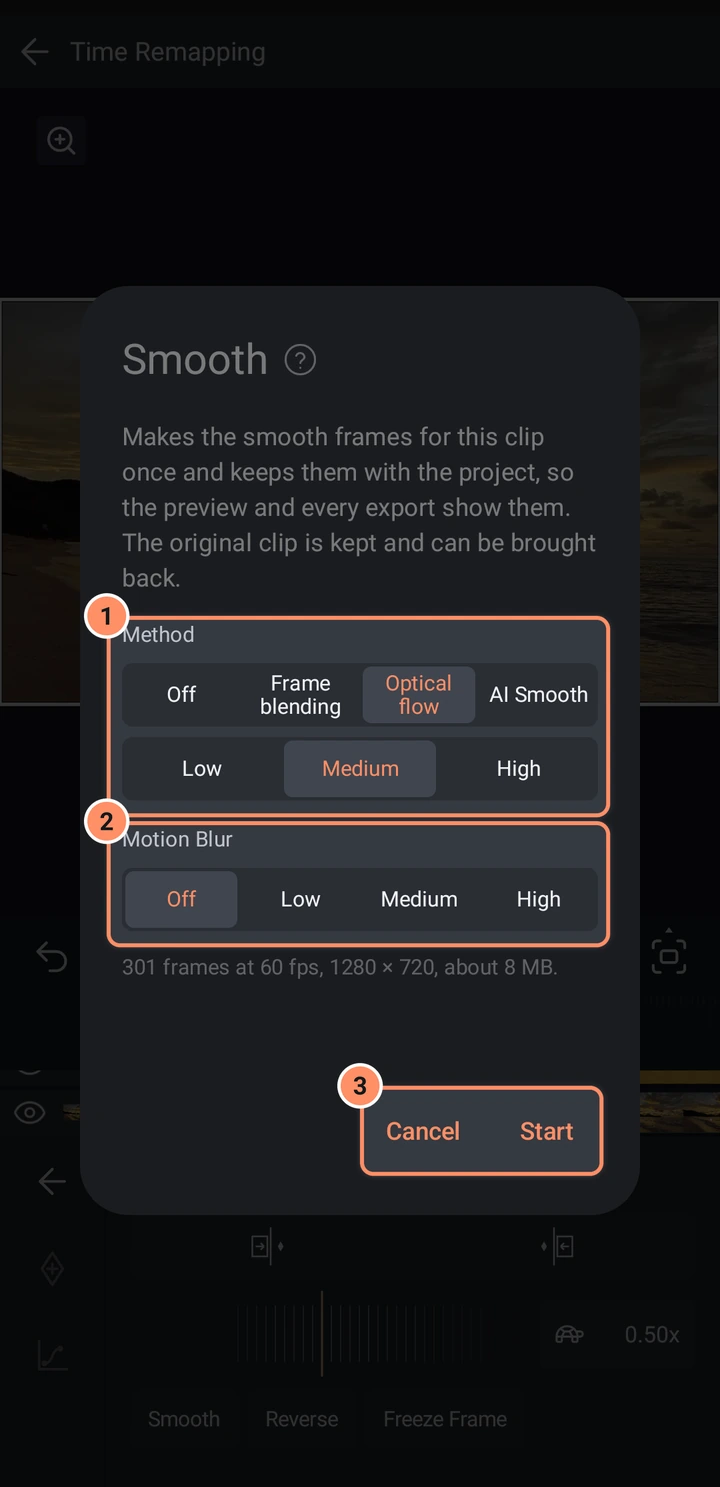
The original clip is kept: the clip shows a Smooth row with a restore button that brings the original back, and Undo works too. Smoothing again always starts from the original. Only the trimmed part of the clip is processed. The clip's sound is kept as it is.
Smoother motion when you export
If your video clips have a lower frame rate than your export, the export screen can also add in-between frames and motion blur for the whole video. See Frame Interpolation and Motion Blur on the Export page.