 AbsentMotion
The home screen
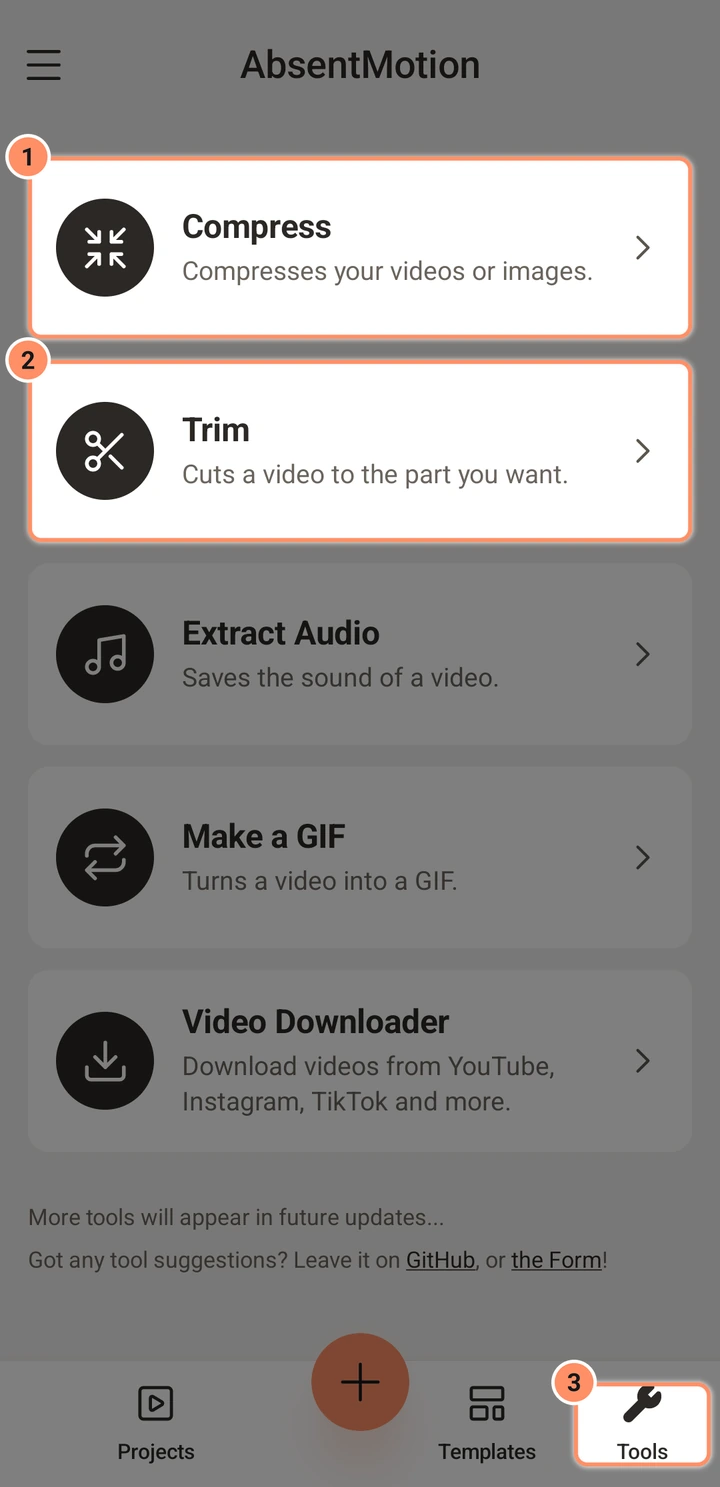
Your projects, assets and templates, the tools in the Tools tab (Compress, Trim, Extract Audio, Make a GIF and Video Downloader) and the buttons around them.
On this page
The home screen is the first thing you see after the first start. It lists your projects and has the buttons for creating one, searching and changing settings. On a tablet with a wide enough screen, the top bar becomes a wide header and projects and templates show as a grid, in portrait and in landscape.
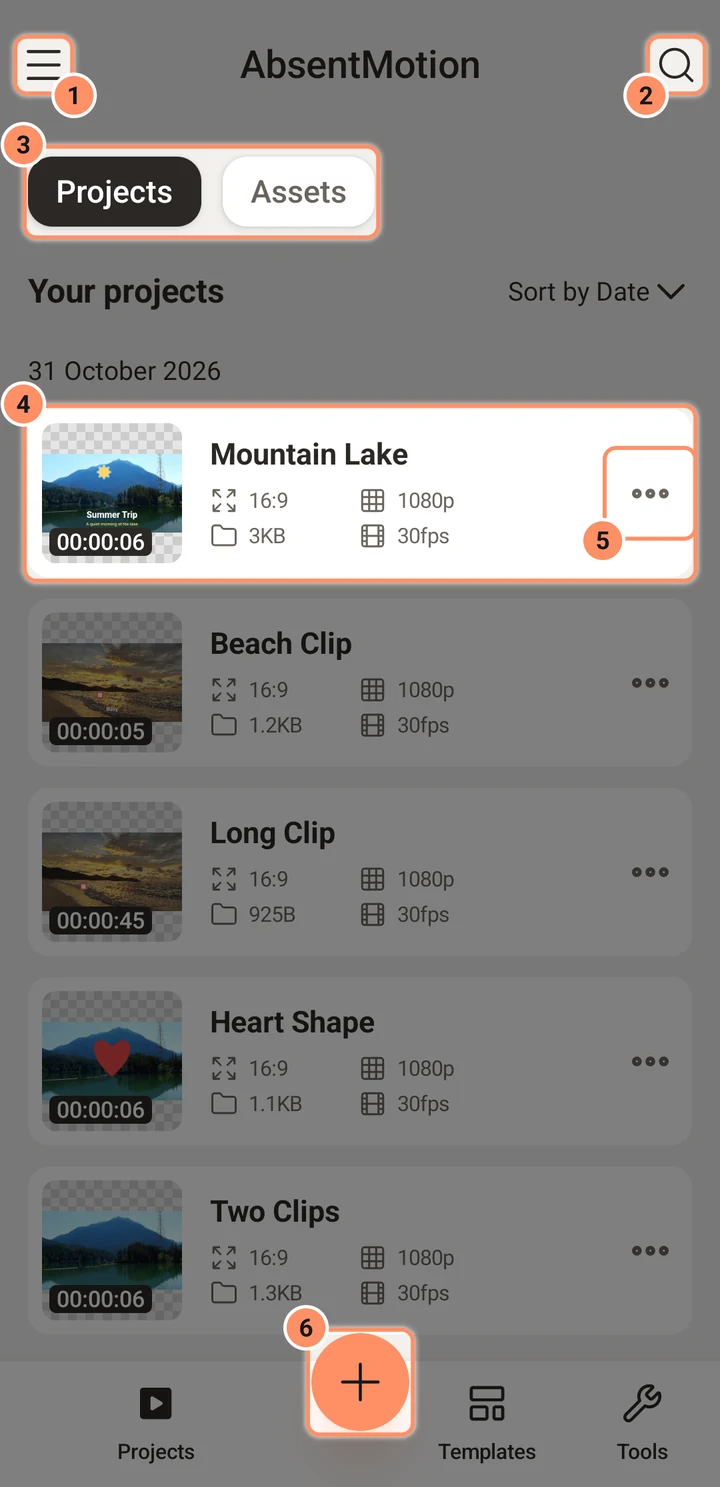
The top bar
- Menu button (top left, three lines). Opens the Settings drawer.
- AbsentMotion in the middle.
- Search (the magnifier at the right). Opens a search field. While searching, the same place shows an X to close it, and the Back button closes it too.
The bottom bar
- Projects, Templates and Tools switch between the three pages of the home screen.
- The round + button between them creates a new project: see Creating a project.
Projects and Assets
The Projects page has two chips at the top, Projects and Assets.
- Projects are your videos and animations. Tap a card to open it in the editor.
- Assets are reusable pieces that you saved from a project or created with the ASSET option of the new project sheet. You add them to other projects from the editor. See Assets, templates and presets.
A project and an asset are stored the same way; they are only listed separately.
What a card shows
Each card has a thumbnail with the project length in the corner, the name, and two lines of facts: the aspect ratio (such as 16:9) and the resolution (such as 1080p), then the file size and the frame rate. The file size is the size of the project file itself. It does not include the photos, videos and audio the project uses, so a project with hours of video can still show a few kilobytes.
The thumbnail is a still taken when you close the editor, at the place where the playhead was. A project you never opened in the editor may show an empty thumbnail.
The card menu
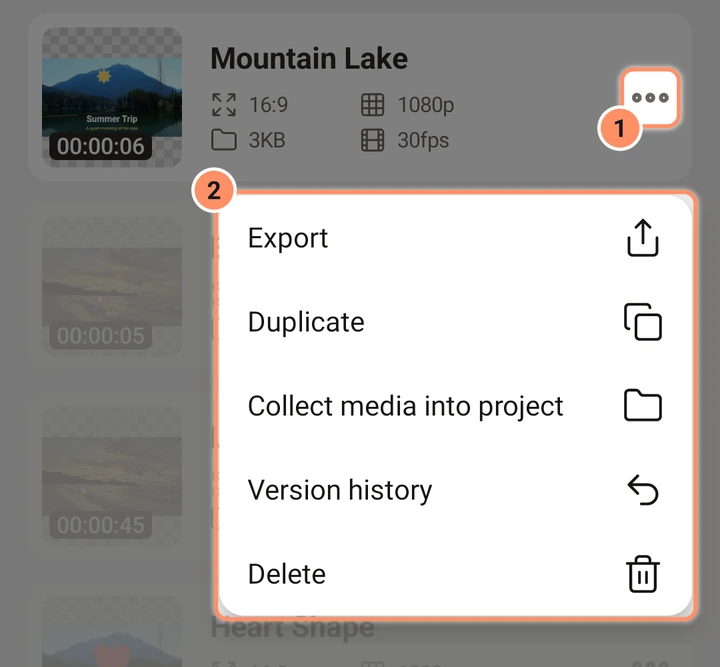
The three-dot button on a card (named More) has these entries.
- Export opens the export screen straight from the list. The "Current Frame" options use the first frame. This is also the only place that offers the XML export. See Export.
- Duplicate (Duplicate Asset for an asset) makes a copy named "name Copy", with its media.
- Collect media into project copies every file the project uses from outside its own folder into the project, so it no longer depends on your gallery. See Projects, backup and import.
- Version history shows earlier versions of the project and lets you go back to one.
- Delete (Delete Asset) asks for confirmation and then deletes the project, its versions and the media copies nobody else uses. There is no trash: a deleted project cannot be brought back, so make a backup first if you are unsure.
A project whose file is damaged shows Damaged — restore a version instead of its facts. Tap it to restore an earlier version, or delete it.
Search
One search box serves the whole home screen. On the Projects page it looks through project and asset names ("Search projects and assets"); on the Templates page it looks through templates and presets. It ignores capital letters and accents, and every word you type has to appear in the name, in any order.
Sorting
On the Projects and Assets lists, the header shows Sort by Date or Sort by Name. Tap it to switch. Date puts the newest first, grouped under date headings. Name sorts from A to Z. The app remembers your choice.
Templates
The Templates page has two chips, My Templates and My Presets. They are described in Assets, templates and presets.
Tools
The Tools page has five cards that work on files, outside any project: Compress, Trim, Extract Audio, Make a GIF and Video Downloader. Tap a card to open it. On a tablet the cards sit side by side, and a tool opens full screen; held sideways, its settings sit in a second column next to the file.
Compress
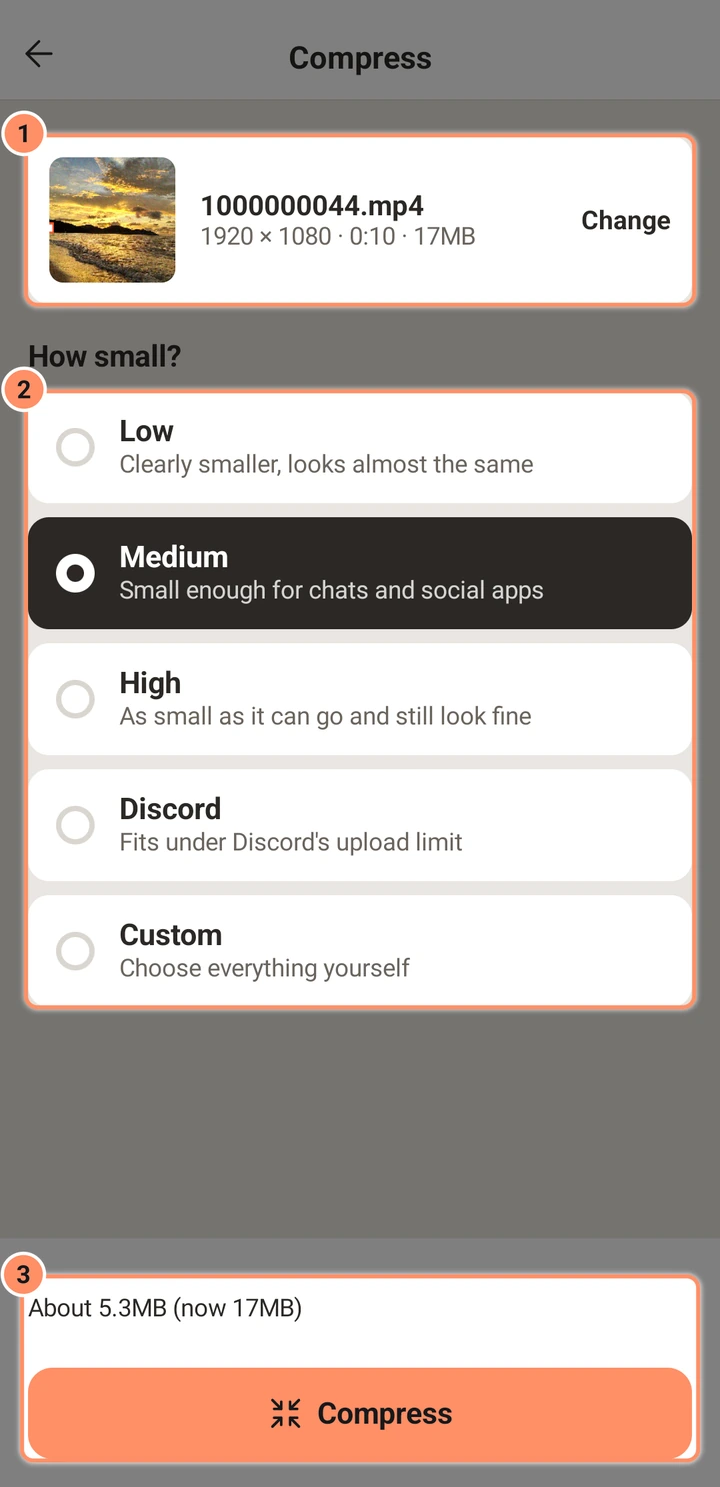
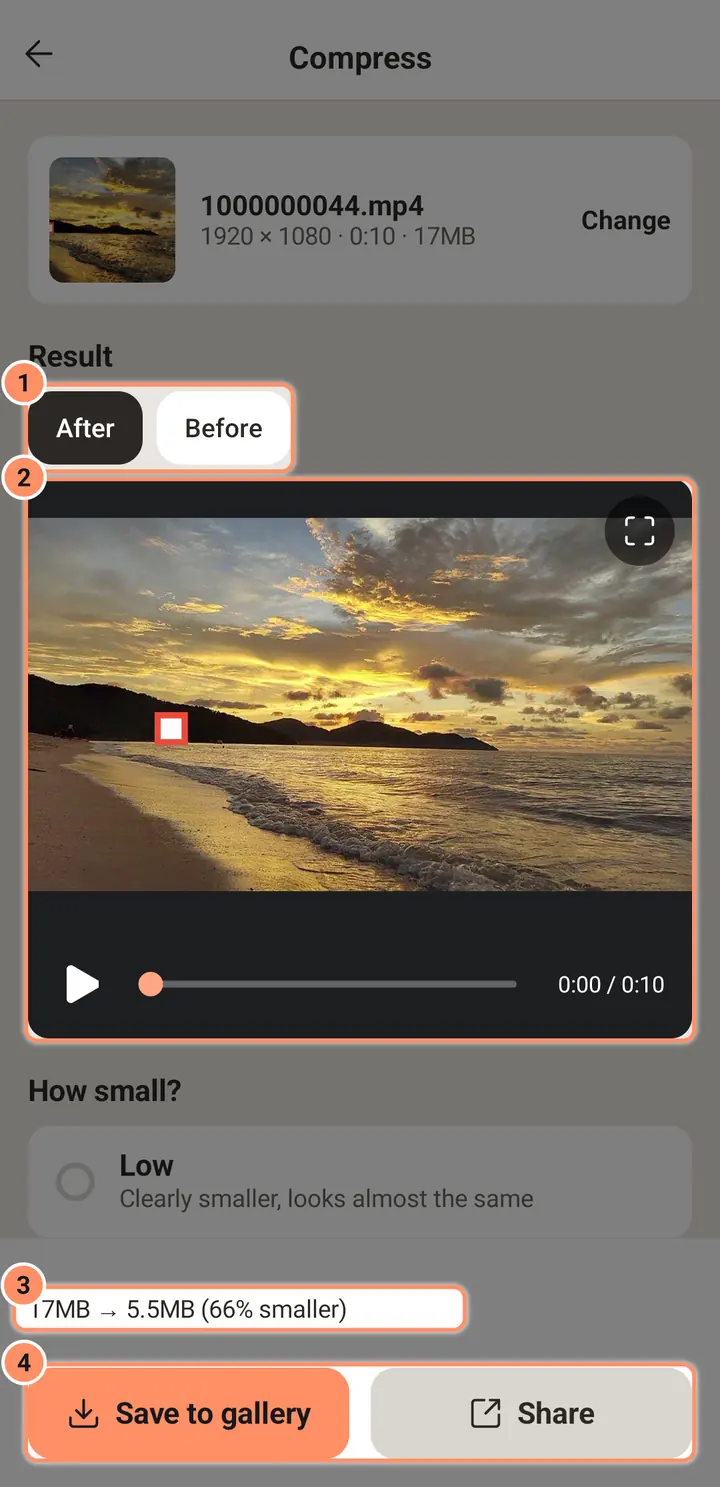
Compress makes a smaller copy of a video or a picture, for example to send it in a chat. Your original is never changed.
- Tap Choose a video or picture and pick the file in the photo picker. Change picks another one.
- Under How small? choose Low (clearly smaller, looks almost the same), Medium (the default: small enough for chats and social apps), High (as small as it can go and still look fine), Discord or Custom. Discord fits under Discord's upload limit and asks which one: Free (20 MB), Nitro Basic (50 MB) or Nitro (1 GB).
- The line above the button gives the size to expect, for example "About 12 MB (now 80 MB)". It also says when the file is already small or too long to fit a size limit.
- Tap Compress. A bar shows the progress and Cancel stops it. The screen stays on while it works.
Custom lets you choose everything yourself:
| Setting | Choices |
|---|---|
| Size | A video: Original, 1080p, 720p or 480p. A picture: Original, 2048, 1280 or 800 px |
| Quality | Best, Good, Small or Smallest; or Aim for a file size, then type the size in MB |
| Frame rate | Videos only: Original, 60, 30 or 24 |
| Sound | Videos only: Off, Small, Good or Best |
| Format | Pictures only: JPEG or WebP |
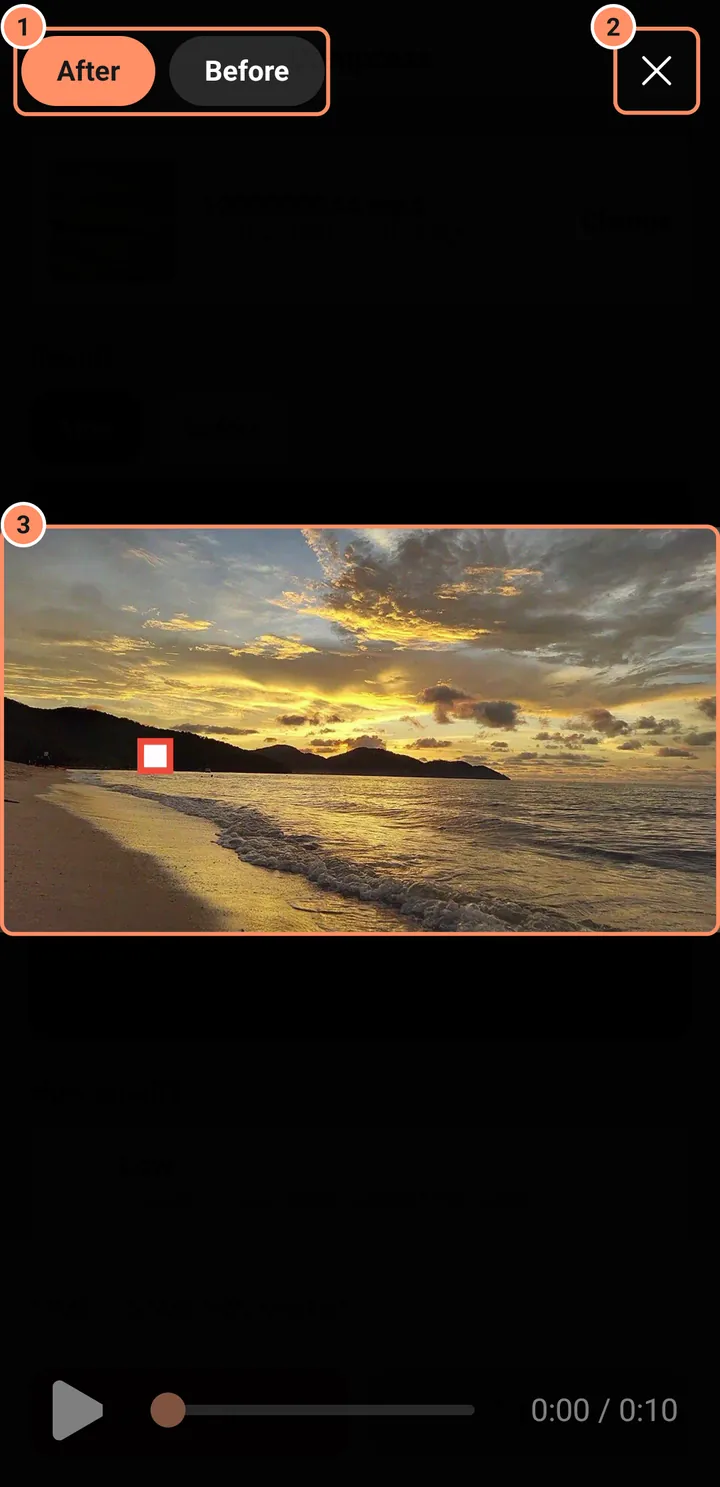
When it is done, the line above the buttons shows the old and the new size and how much smaller the file got, for example "17MB → 5.5MB (66% smaller)". If it did not get smaller, it says so and suggests keeping your original. Under Result, the chips After and Before switch the preview between the new file and the original, and the button at the top right of the preview opens a Full screen view with the same two chips. Tap Save to gallery to keep the new file (videos go to Movies/AbsentMotion, pictures to Pictures/AbsentMotion) or Share to send it to another app.
Trim
Trim keeps the part of a video you choose and saves it as a new MP4 video. Your original is never changed.
- Tap Choose a video.
- Under Part to keep, drag the two ends on the strip of pictures. The big picture above shows the frame at the end you are moving. Start and End have arrows that move that end a little earlier or later, and Length shows how long the part is.
- Under How? choose Fast (the default: no re-encoding, so it is quick and keeps the quality; the start snaps to the nearest cut point of the video) or Exact (cuts exactly where you choose, but takes longer). With Fast, the Start arrows jump from one cut point to the next.
- The line above the button gives the size to expect. Tap Trim.
If a video has hardly any cut points, Fast can only start at the beginning, and the screen says so: choose Exact to start anywhere.
Extract Audio
Extract Audio saves the sound of a video as an audio file.
- Tap Choose a video. A video without sound says "This video has no sound."
- Format: M4A (the default) or MP3.
- Quality: Small, Good or Best. For an M4A there is also Original, which copies the sound as it is, with no loss, when the video's sound allows it. The app then picks it for you.
- The line above the button gives the size to expect and the length. Tap Extract.
To take the sound out of a video inside a project instead, use Extract Audio in the layer menu: see Audio.
Make a GIF
Make a GIF turns part of a video into an animated GIF.
- Tap Choose a video.
- Under Part to keep, choose the part as in Trim. A GIF can be up to 30 seconds long.
- Size is the long side of the GIF: 320, 480 (the default) or 720 px. Frame rate: 10, 15 (the default) or 24. Loop: Forever (the default) or Once.
- The line above the button gives the size to expect and the number of frames, measured on a few sample frames. If the GIF will be over 25 MB it says "This GIF will be big. Try a smaller size or a shorter part." Tap Make GIF.
The result of Trim, Extract Audio and Make a GIF
A bar shows the progress, and Cancel stops it. When it is done, the line above the buttons shows the size of the new file, and Result shows it (a sound shows its name). Tap Save to keep it, or Share to send it to another app. Videos go to Movies/AbsentMotion, GIFs to Pictures/AbsentMotion and sounds to Music/AbsentMotion. If something goes wrong, the line says what happened, for example "This is too big for this phone. Try a smaller size or a shorter part."
Video Downloader
The Video Downloader saves a video from a link to your phone. It needs a free add-on, a one-time download that the screen shows the size of (about 25 MB). The add-on brings the open source tools Python and yt-dlp, and you can remove it again in Settings with Delete Video downloader add-on. It works on phones with a 64-bit processor.
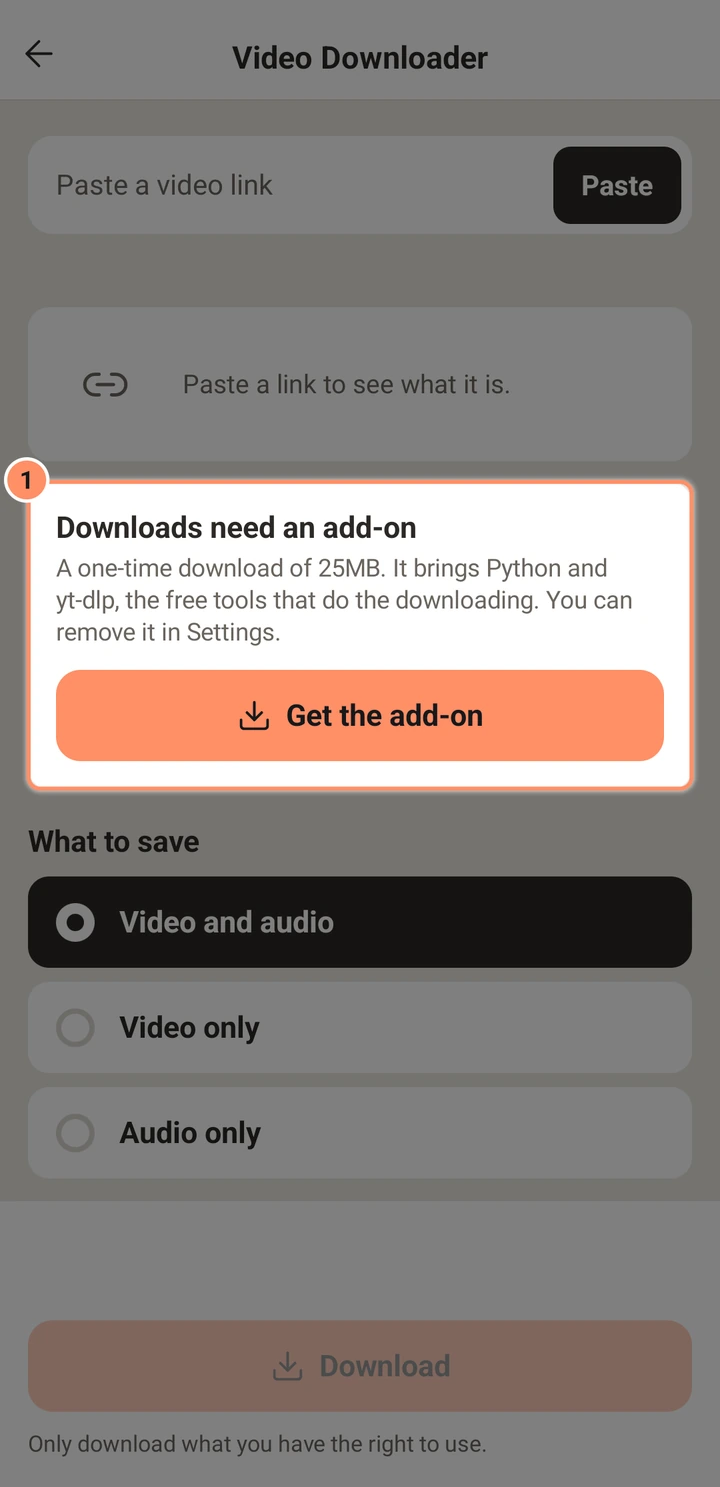
- The first time, tap Get the add-on on the card that says "Downloads need an add-on".
- Copy the link of a video in another app, then tap Paste (or type the link in the field; the X clears it). The app checks the link and shows its title, a small picture and what it is, for example "YouTube · Video · 10:35".
- Under What to save choose Video and audio, Video only or Audio only.
- Under Quality pick one of the qualities the video has. Each shows its size, for example "1080p60 · about 255MB". A post with only pictures has nothing to choose: its pictures are saved as they are.
- Tap Download. When it is done the message says where the file is, for example "Saved to Movies/AbsentMotion", and two buttons appear: New project opens a new project with the video in it, and Compress opens the Compress tool with the file.
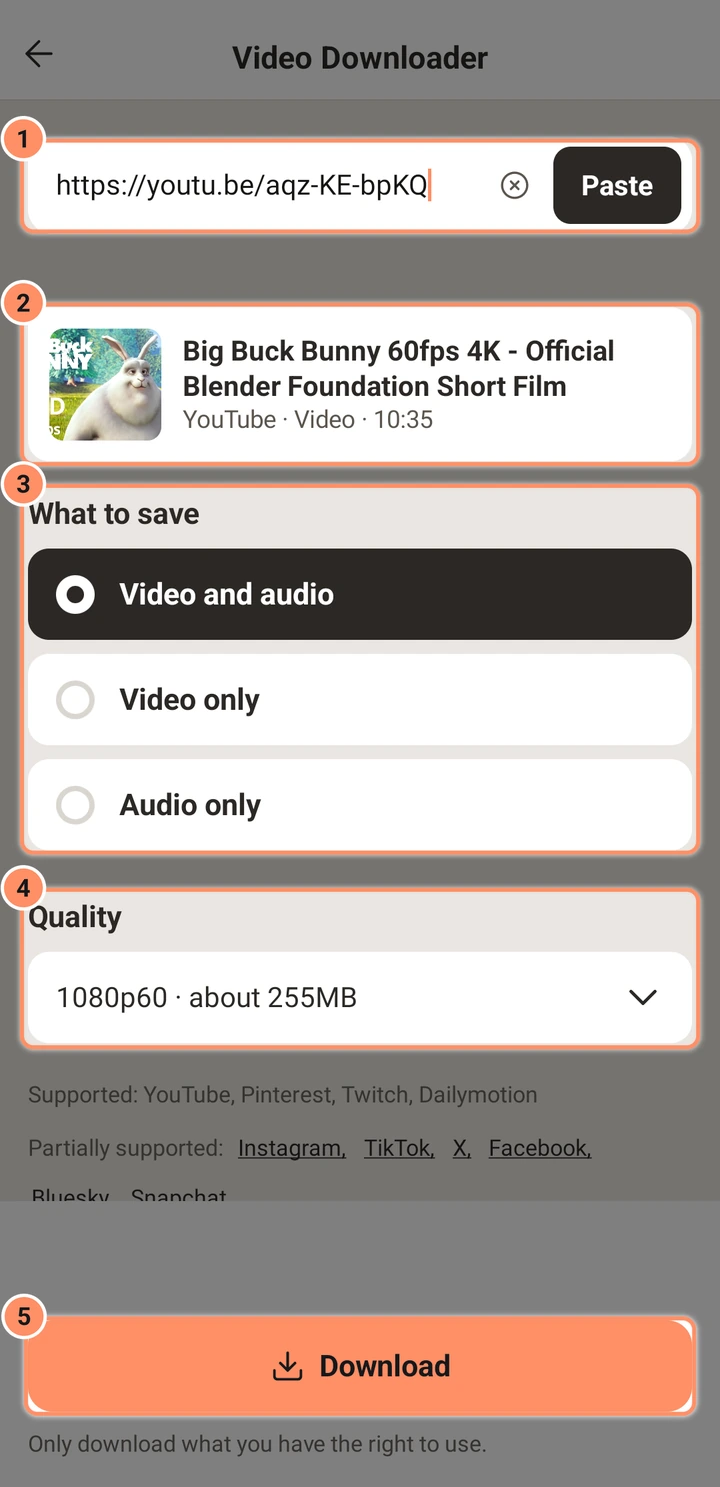
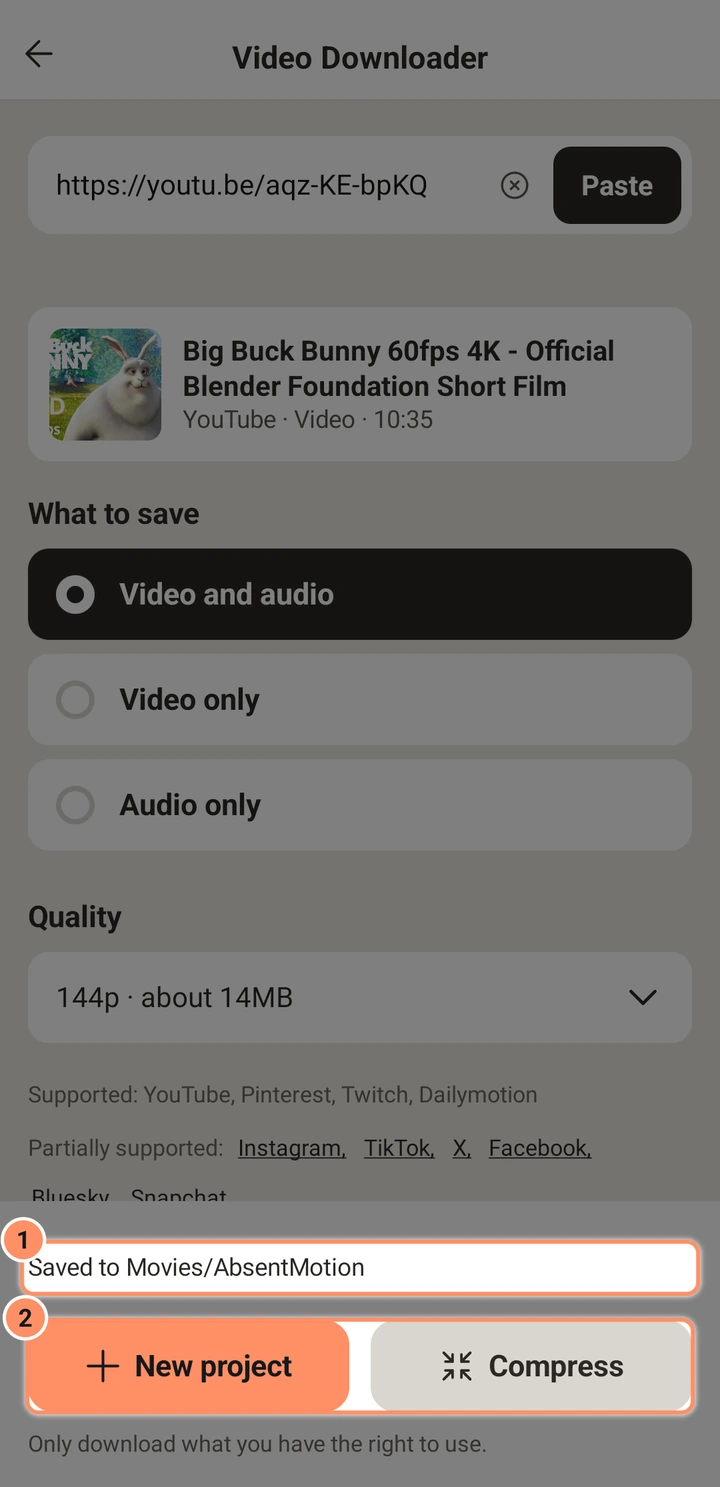
Below the button, Supported lists the sites that work, and Partially supported the ones that work with limits. Tap a name there to read the limit, for example that Instagram stories and private posts need a signed-in account, so they cannot be downloaded. A link that cannot be downloaded shows the reason: a private or removed video, a post that needs a signed-in account, a playlist, a site that blocked the download or no connection.
Only download what you have the right to use: the screen repeats this under the button.
The Video Downloader is not in the computer version yet, nor in the Intel or AMD files for Chromebooks.
Importing a project file
By default the home screen has no import button. You can open a project file from another app (a file manager, a message) with Share or Open with, and the app takes it. If you prefer a button, turn on Show the import card in the project list in Settings; a card with Choose file then appears at the top of the Projects list. See Projects, backup and import.
When something is wrong
- If the app closed unexpectedly, the next start shows AbsentMotion closed unexpectedly with the reason and, if there were unsaved edits, an offer to restore them.
- Crash logs are in Settings under Crash logs.
- For an outdated version, the app can tell you about a newer one: see Settings.