 AbsentMotion
Layer menus and multi-select
The layer menu, the copy and paste menu, and everything you can do with several layers at once.
The layer menu
Select one layer and tap the three dots at the right of the top bar (Layer menu).
- Save to My Assets saves the layer or group as an asset. See Assets, templates and presets.
- Flip Horizontally and Flip Vertically.
- Crop (photos and videos) opens the Crop panel. See Layer tools.
- Fit to Canvas scales the layer evenly until it fits inside the canvas. Fill the Canvas scales it evenly until it covers the canvas. Stretch to Canvas stretches it to exactly the canvas.
- Create Clipping Mask clips this layer to the shape of the layer directly below it. Release Clipping Mask undoes it.
- Ungroup (groups) puts the layers of the group back into the project. See Shapes, drawing and masks.
- Convert to Outline turns text or a parametric shape into an editable path. Text loses its text content and font settings.
- Extract Audio (videos only) adds an audio layer from the video's sound and mutes the video.
- Track Motion (videos only). See Motion tracking.
- Mark Beats (layers with sound) adds bookmarks on the beats. Audio layers also have it as a tile in their tools. See Audio.
- Media Info (photos and videos) shows name, dimensions, frame rate, duration, format and size. Swap media file replaces that file in every layer that uses it.
- A row of label colors at the bottom.
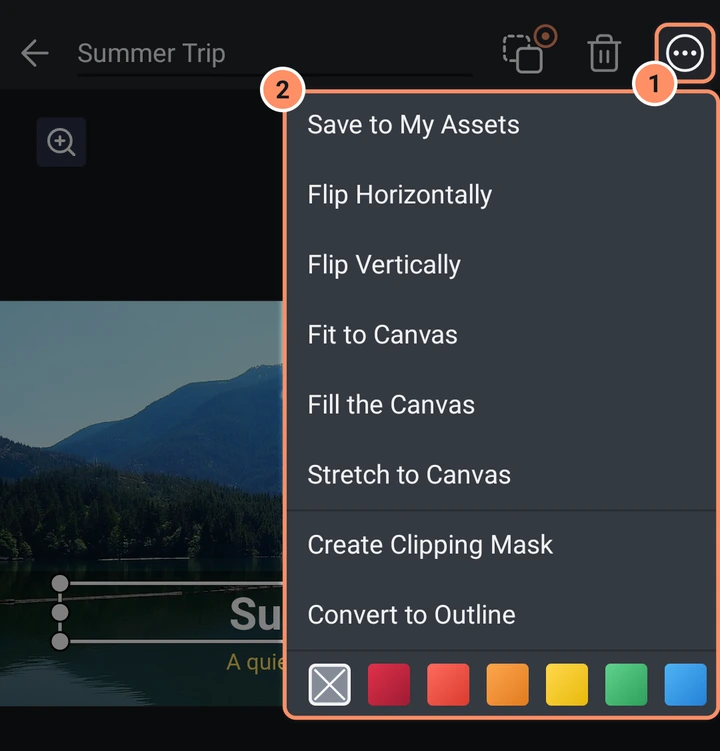
Audio layers have a shorter menu. Entries that do not apply to the layer are grayed out.
The copy and paste menu
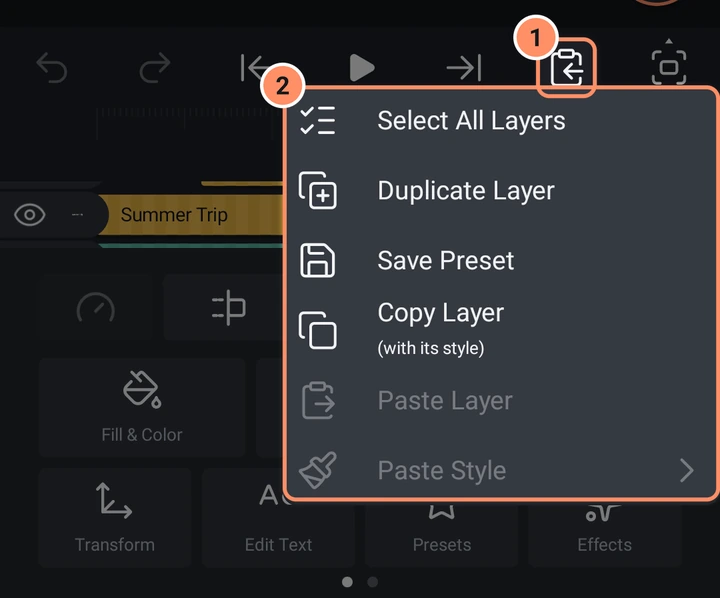
The sixth button of the play bar.
- Select All Layers starts a multi-selection.
- Duplicate Layer makes a copy just above the original, named "name Copy". With several layers selected it duplicates all of them.
- Save Preset saves the look of the layer. See Assets, templates and presets. It is only available when the layer has something worth saving.
- Copy Layer (with its style) copies the layer, its effects and keyframes. The clipboard lives in memory only and is empty again after you close the app.
- Paste Layer pastes at the playhead. With several layers, the earliest one starts at the playhead and the others keep their distance.
- Paste Style has four entries: Paste Fill & Color, Paste Frame & Shadow, Paste Opacity & Blend Mode and Paste Style (all three) from the last copied layer onto the selected layer.
Selecting several layers
Press and hold the eye or the name area of a layer row, then slide up or down across rows to select a range. After that, a tap on a row adds or removes it. Starting the slide on a row that is already selected deselects the range instead.
The top bar changes color and shows:
- Cancel selection (X) and the number of selected layers.
- Group puts the layers into one group layer that lasts as long as its members. Group & Mask and Group & Exclude do the same and set the top layer's blend mode to Mask or Exclude.
- Link to parent links every selected layer to one layer you pick (or to none). Each layer stays where it is on screen. Layers that the chosen parent is already linked to are skipped.
- Delete selected layers.
- Alignment options (an arrow) opens Align left, Align center, Align right, Align top, Align middle, Align bottom, Distribute vertically and Distribute horizontally (three or more layers). One layer aligns to the canvas; several align to the box around the selection.
A second bar at the bottom of the screen works on timing:
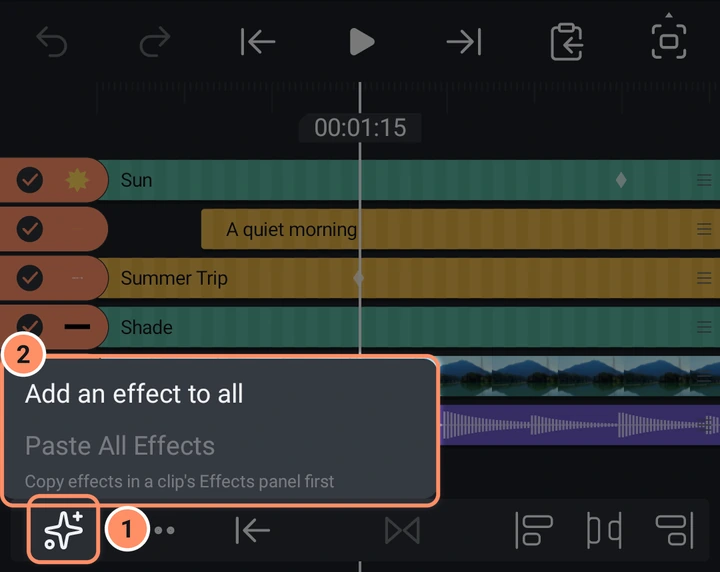
- Effects opens a small menu. Add an effect to all opens the Effects Library and adds the effect you pick to every selected visual clip. Paste All Effects pastes the effects you copied in a layer's Effects panel onto every selected visual clip; it is grayed until you have copied some. Sound, camera and null layers are skipped, and a message tells you how many.
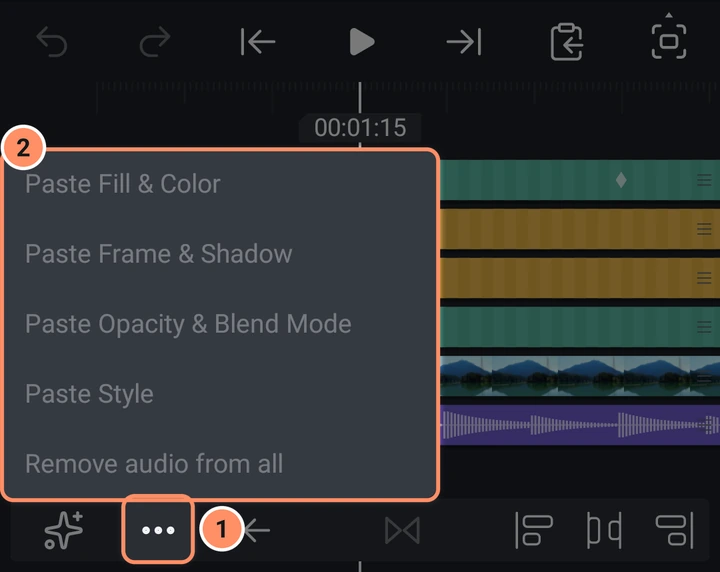
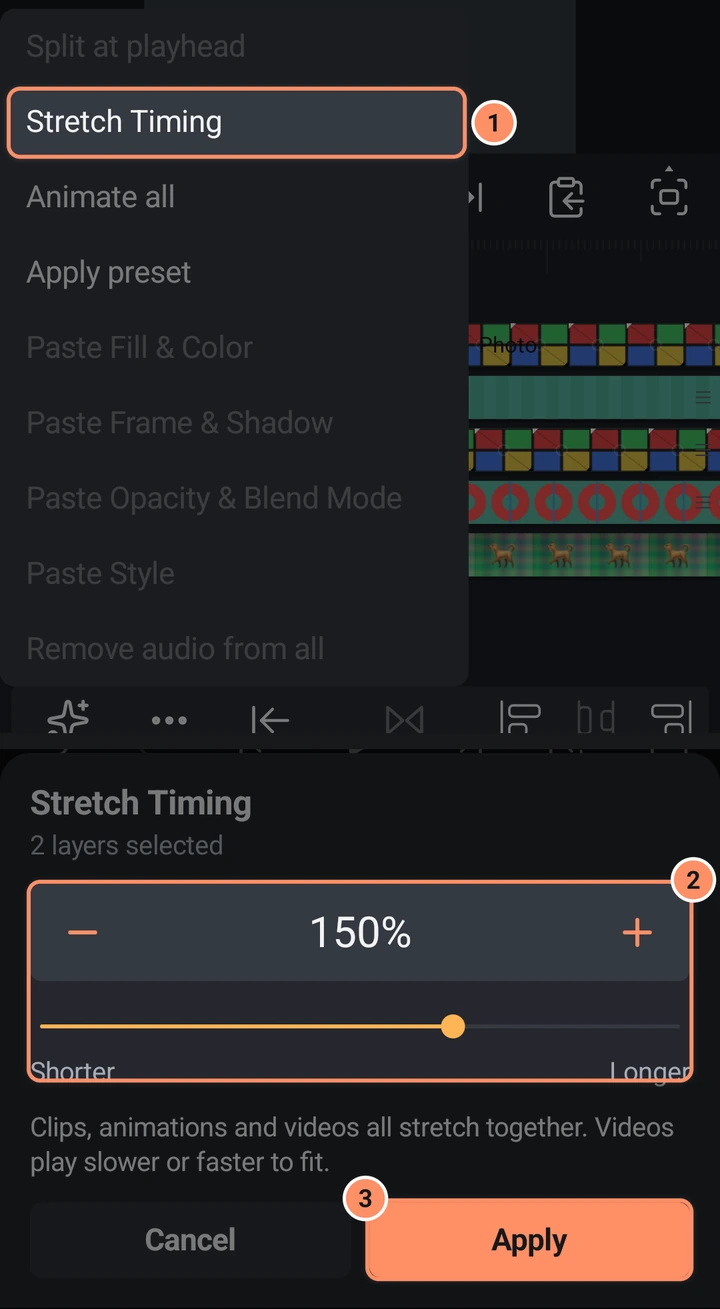
- More actions (three dots) opens a second menu. Split at playhead cuts every selected clip that the playhead is on in two, in one step. Stretch Timing makes every selected clip longer or shorter together: pick a percentage (150% makes them one and a half times as long) and tap Apply. Their animations stretch with them and videos play slower or faster to fit; the earliest selected clip keeps its start. Animate all opens the In, Out and Loop animations and gives the one you pick to every selected visual layer. Apply preset opens your saved presets and applies the one you pick to every selected layer. Both are one step for Undo, and a message tells you how many layers got it. Paste Fill & Color, Paste Frame & Shadow, Paste Opacity & Blend Mode and Paste Style put the look of the last copied layer onto every selected layer; they are grayed until you have used Copy Layer. Remove audio from all sets the volume of every selected video to zero.
- Move clip starts to playhead or Move clip ends to playhead
- Add a transition between the two clips (two visual clips that overlap or touch). With more than two clips selected, the transition you pick goes on every cut between them, which is handy for auto captions that sit back to back. See Transitions and animations.
- Align clip starts, Align clip ends and Distribute clip starts (three or more).
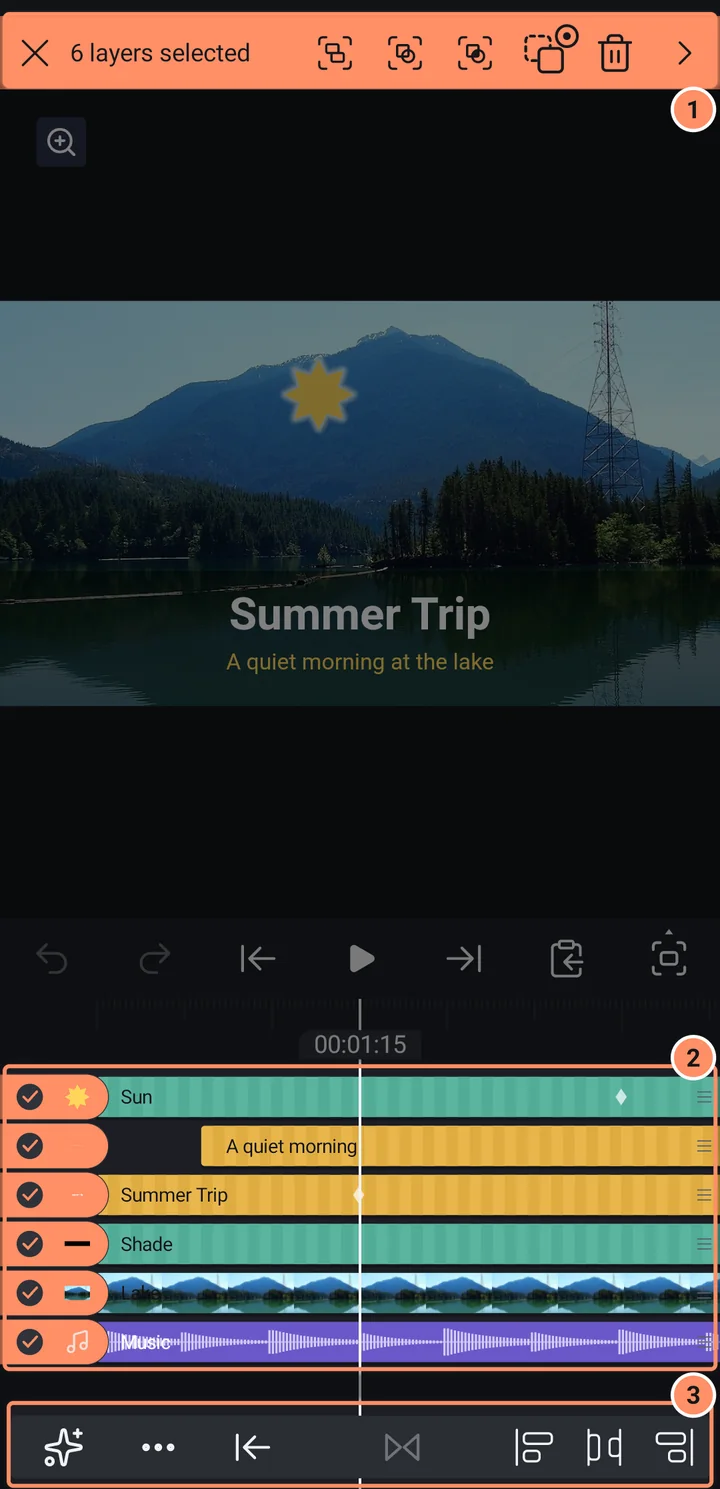
On the timeline, every selected clip shows its trim grips. Dragging the grip of one of them moves the same end of every selected clip; each clip stops at its own limit, and the whole drag is one step for Undo.
Grouping from a multi-selection is the way to make a group. To change the layers inside a group later, select it and tap Edit Group; see Shapes, drawing and masks. To change a group that was inserted from an asset, open the original asset.