 AbsentMotion
Assets, templates and presets
Reuse your best work: save layers as assets, start from templates and keep your favorite looks as presets.
AbsentMotion has three ways to reuse work. They differ in what they keep.
| Keeps | Used from | |
|---|---|---|
| Asset | A layer or a whole animation, linked to its source | Add menu, Object / Asset |
| Template | A whole project with places where you swap in your own media | Add menu, Template; home screen, Templates |
| Preset | The look and the motion of one layer (effects, keyframes, border, blend mode and more) | Tool grid, Presets |
Assets
Make an asset
- In the editor, select a layer or group and choose Save to My Assets in the layer menu. A message says "Saved to My Assets".
- On the home screen, choose ASSET in the new project sheet and build the animation in its own project. An asset project has a transparent background.
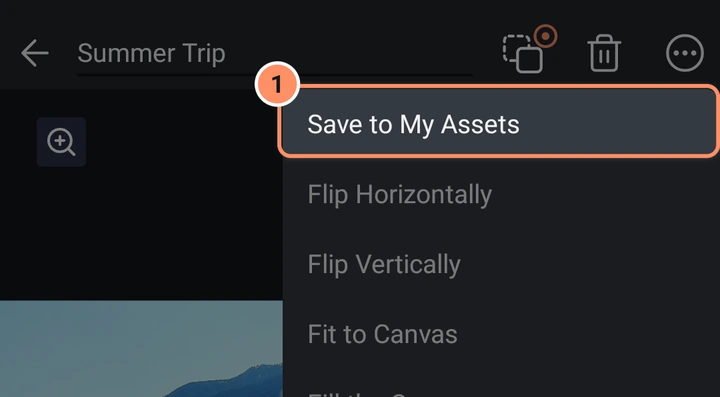
Assets appear under the Assets chip of the home screen.
Use an asset
Add, Object / Asset, Asset / Project lists your assets (newest first), then your other projects, with a search box. Tap one to insert it as a group at the playhead. An asset stays linked to its source asset. A project inserted this way is a plain independent copy instead.
A linked layer has the tool Asset Properties with two buttons.
- Open original Asset opens the asset's own project so you can change it. If that project was deleted, the app offers Rebuild Source Project (make a project from this layer) or Unlink from Asset.
- Unlink from Asset turns the layer into an ordinary group that you can edit freely.
Asset projects
Inside an asset project, the project settings sheet has two more rows.
- Precompose chooses Adaptive Resolution or Locked Resolution for the asset.
- Re-timing decides what happens when the asset is placed on a longer clip than its own length: Freeze (hold the last frame of the middle part), Stretch, Loop, Repeat & Stretch or Blank (nothing after its own length).
The copy and paste menu also gets Set intro end and Set outro start. They put gold flags on the ruler: the part before the intro end and after the outro start keeps its real speed while the middle is stretched, looped or frozen.
Templates
A template is a finished project in which every picture or video is a slot you can replace.
Use a template
- On the home screen open the Templates page and the My Templates chip, and tap a template. From inside the editor you can instead use Add, Template.
- The Use Template screen shows a preview and a row of Media slots. Tap a slot to select it (the playhead jumps to where it starts), then tap it again to pick your own photo or video.
- The corner icon on a slot changes how the media is scaled: fill, fit or stretch.
- If your video is longer than the slot, a screen titled Drag across to select lets you choose which part to use. If it is shorter, the last frame is held and the app tells you.
- Tap Next, and then Go to Timeline. A new project is made. The template itself is never changed.
Open as project in a template's menu skips the swap screen and makes a new project right away. Templates can also be renamed and deleted from that menu.
Make a template
- Turn on the switch Also keep a copy as a Template on the export screen before you export. It keeps the project with its media in Templates on this phone, and runs after the export succeeds.
- Packages that you import from other editors arrive as templates: see Projects, backup and import.
Presets
A preset keeps the look of a layer so you can put it on another one.
Save a preset
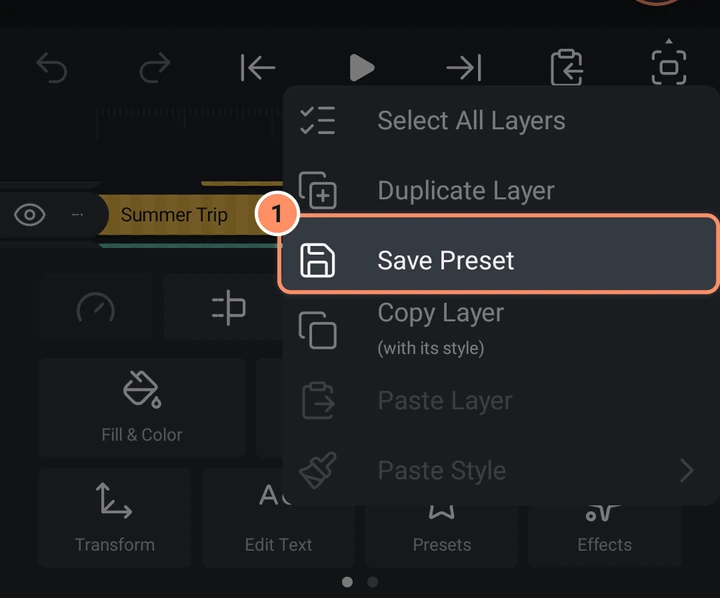
Select the layer and choose Save Preset in the copy and paste menu (the sixth button of the play bar). It is only available when the layer has something to keep: a stroke, border or shadow, effects, a blend mode other than Normal, a changed opacity, animated position or size, a changed volume or speed, or a changed font. After saving, you can Name it.
Use a preset
Select another layer and tap Presets in the tool grid. The Try a Preset screen shows the layer on its own with your preset applied. Tap a preset to try it, tap the preview to play it, and tap Apply to keep it. Each preset has Rename and Delete in its menu.
A preset replaces the border, shadow, blend mode and opacity, animated transform, effects, text style (text to text), volume and audio effects (sound to sound) and speed (clip to clip). It does not change the fill color, the shape, the content or the timing.
There are no built-in presets: only the ones you save. They are listed on the home screen under Templates, My Presets, where you can rename and delete them.